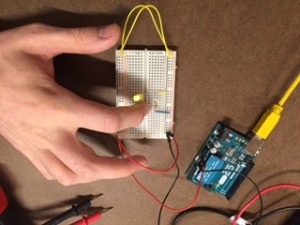
This week I did my first work with circuits by reviewing our class work and the labs available on the PComp website.
I started with a simple circuit powered off of the Arduino containing a 220 ohm resistor, an LED, some little wires, and a button that came with my Arduino starter kit.
The next challenge was to add a couple more LED, first in series and then in parallel to get a sense for how voltage and current change when more components are added.
As expected when the three LEDs were arranged in series behind the resistor, none of them lit up when power was connected because the voltage that each was receiving was divided amongst the three and failed to reach the level necessary. When I rearranged them into parallel each of them lit up because the voltage was now high enough since the current is what is divided when the components are arranged in parallel.
Next I soldered and attached a Potentiometer to vary the brightness of the LEDs.
*Video*
This worked surprisingly well and I had way too much fun dimming a single LED on and off.
Lastly I set out to develop a switch myself to use with this board. I decided I’d like to make a switch that reacts to wind and the process turned out to be fairly simple. I attached a couple of wires to the board ahead of my resistor and LED (roughly where the button had been) and put some aluminum foil on the ends of each of them. When the two leaves of aluminum foil touch it completes the circuit and turns on the LED. I mounted this contraption above my A/C and was eventually able to get the switch to activate the circuit as the air blows and to turn off when it doesn’t.
*Video-2*
Success!


